Contact Management in Voyant Connect
Editing Contacts
Contacts from your directory are typically other users in your company. The profile details are based on what is in the company directory. You can add edit other fields on the contact which are then private to your client. To edit a contact, control-click or right-click the client, then choose Edit Profile from the menu. A new tab will appear with the contact information ready to edit.
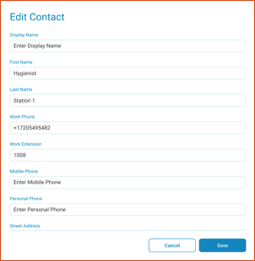
Most fields can be updated except the users IM address. Click Save to update the entry.
Adding Conference Bridge Contacts
You can also create contacts for any conference bridges you routinely call into. To create a conference bridge contact, click the + sign to create a new contact. Provide a display name such as Weekly Bridge. Scroll to the bottom of the entries to edit until you reach Dial-in Number.

Enter the conference bridge dial-in number, then enter the conference ID and/or PIN if the bridge has one.
When you double-click the contact or choose call from the menu, the client will call the conference bridge number, pause, then dial the conference ID, pause again and then dial the Security PIN. The client adds the usual # to the end of each digit sequence so you don’t need to enter that as part of the conference ID or security PIN.
NOTE: The conference ID and security PIN are not strictly used for those purposes. These fields can be any sequence of digits you routinely use to access a conference bridge. The client will only dial a digit sequence if something was entered in either of the fields. If a field is empty, the client will not dial anything for that field.
Voicemail Contact
If you frequently transfer callers to a contact’s voicemail, edit that contact’s profile and use one of the entries, such as Personal Phone, to enter a digit string that includes the necessary * code. For example, if that user’s extension is 1001, enter *551001 as the Personal Phone number.
Favorites
If you have contacts you frequently use, mark these as a Favorite by control-clicking or right-clicking on that contact and choose Set as Favorite from the menu. This creates a group named Favorites and keeps this group at the top of your contact list.
Contact Sorting
By default, contacts are sorted last name first. This can be changed from the top-level menu by choosing Contacts->Sort by First Name.
Using Groups
Contacts can also be grouped. To create a new Group, click the + sign in the profile and choose the Group icon.
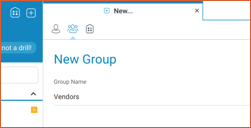
Once you have a group created, control-click or right-click on a contact, then choose Add to Group and select the group.
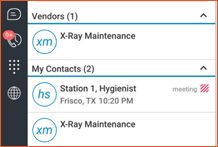
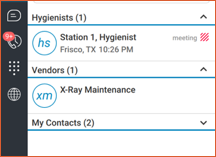
The default My Contacts group will always contain all of your contacts. Any contact can be added to multiple groups. If you organize all of your contacts into Groups, then click the up-facing arrow on the My Contacts row to collapse the full list of contacts.
Searching Contacts
The search box lets you quickly find contacts. Just begin typing a number or part of a name and the list of matches will show with the search part highlighted. The matches are separated into ones found in your own contacts as well as any matches in the company directory.
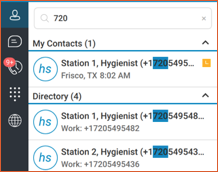
When you find a match you want, move the mouse pointer over the entry and a menu will appear with quick profile information and your options for contacting that user.
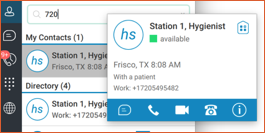
If the contact is part of your company, the options are chat, call from your client, video call from your client, call from your desk phone or view profile information for this contact. Options for external contacts may only include audio calling features.
If you enter a complete number in the search box and press enter, the client will call that number.
