How to log in, audio/video set up, accessing contacts, call history, voicemail, and chat features on our soft phone messaging client
Download the Client
You first must download the client to your PC/Mac or smartphone. You can download it here.
Login
To log in to the Voyant Connect client for the first time, follow these steps:
- Launch the program on your PC, Mac, or Mobile Client.
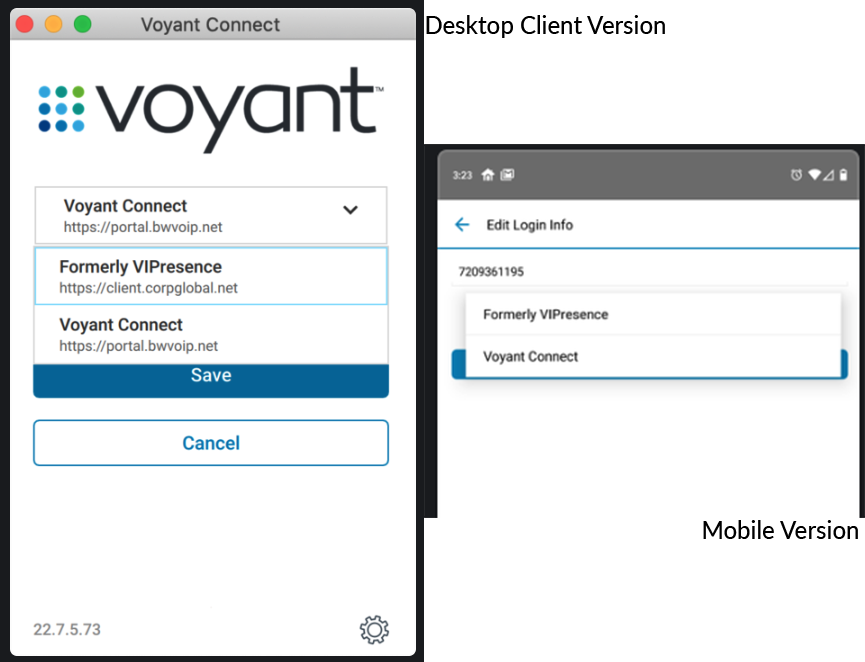
- Select the Settings Icon at the bottom right of the login screen. Click Edit Login Preferences
Select:
Voyant Connect: Choose this option if you are new to the Voyant Connect service or were previously running an application called Voyant Connect for iPhone, Voyant Connect for iPad, Zen Connect for Mobile, or Zen Connect for Table.
Formerly VIPresence: Choose this option if you were previously running an application called VIPresence (iOS or Android)
NOTE: Don’t worry if you choose the wrong one. To change it at any time, touch the gear icon in the lower right corner of the login screen above, then choose Edit Login Info from the menu. Select the other region option, save and then retry logging into your account. If on Mobile client, touch the field that says “This Phone Number” and enter your phone number. - Enter your Username and Password to login. Optionally, set the Remember Password option and/or the Sign in automatically option if you don’t want to enter the information every time you login.
** If you have errors on first login, you may need to include the domain name along with your DID for the username the first time. The domain depends on your login region. Use the following below:
If you chose “Voyant Connect” use a login in the form: 5551112222@bwas.voice.onvoy.net
If you chose “Formerly VIPresence” use a login in the form: 5551112222@corpglobal.net

Audio/Video Setup
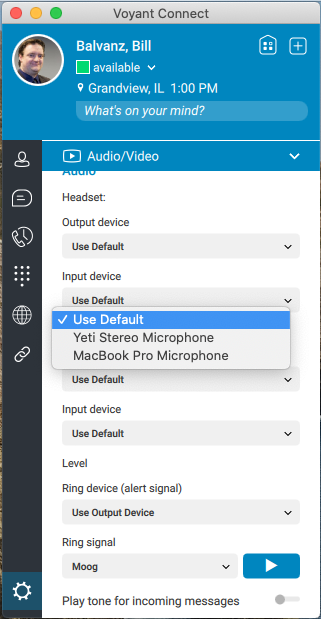
By default, the program will use the default input and output devices for your computer. To change these, follow these steps:
- Go to the Preferences section (the gear at the lower left corner)
- Select the Audio/Video section from the drop-down menu at the top
- Use the drop-down menus for headset or speakers output and input devices to change them from the default.

Accessing the Global Directory
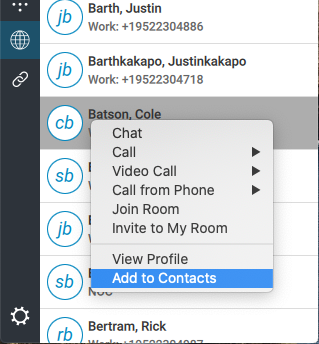
Your service includes an enterprise directory which lists all of the extensions that have been built in your PBX. To access these listings, press the Globe icon on the left side menu.
Add a Contact
From the global directory, find the contact you wish to move to the contacts tab. Right click and select Add to Contacts.

Accessing Call History and Voicemail (Desktop Version)
The Call History icon on the left side navigation will allow you to see your incoming and outgoing call logs. The Voicemail tab at the top of that page will let you access your visual voicemails and listen to them, repeat them, or delete them.
Accessing Voicemail (Voicemail App)
To access your voicemail with the mobile app, hold the 1 key on the keypad until it calls your voice portal.
Transfer Calls
You can find instructions for call transfers here.
Conference Calls
You can find details about conference calls here.
Chat Features
The Chat History icon will allow you to view and recall past chats. To initiate a chat, select the contact from the contacts panel or the corporate directory and select Chat.
MyRoom
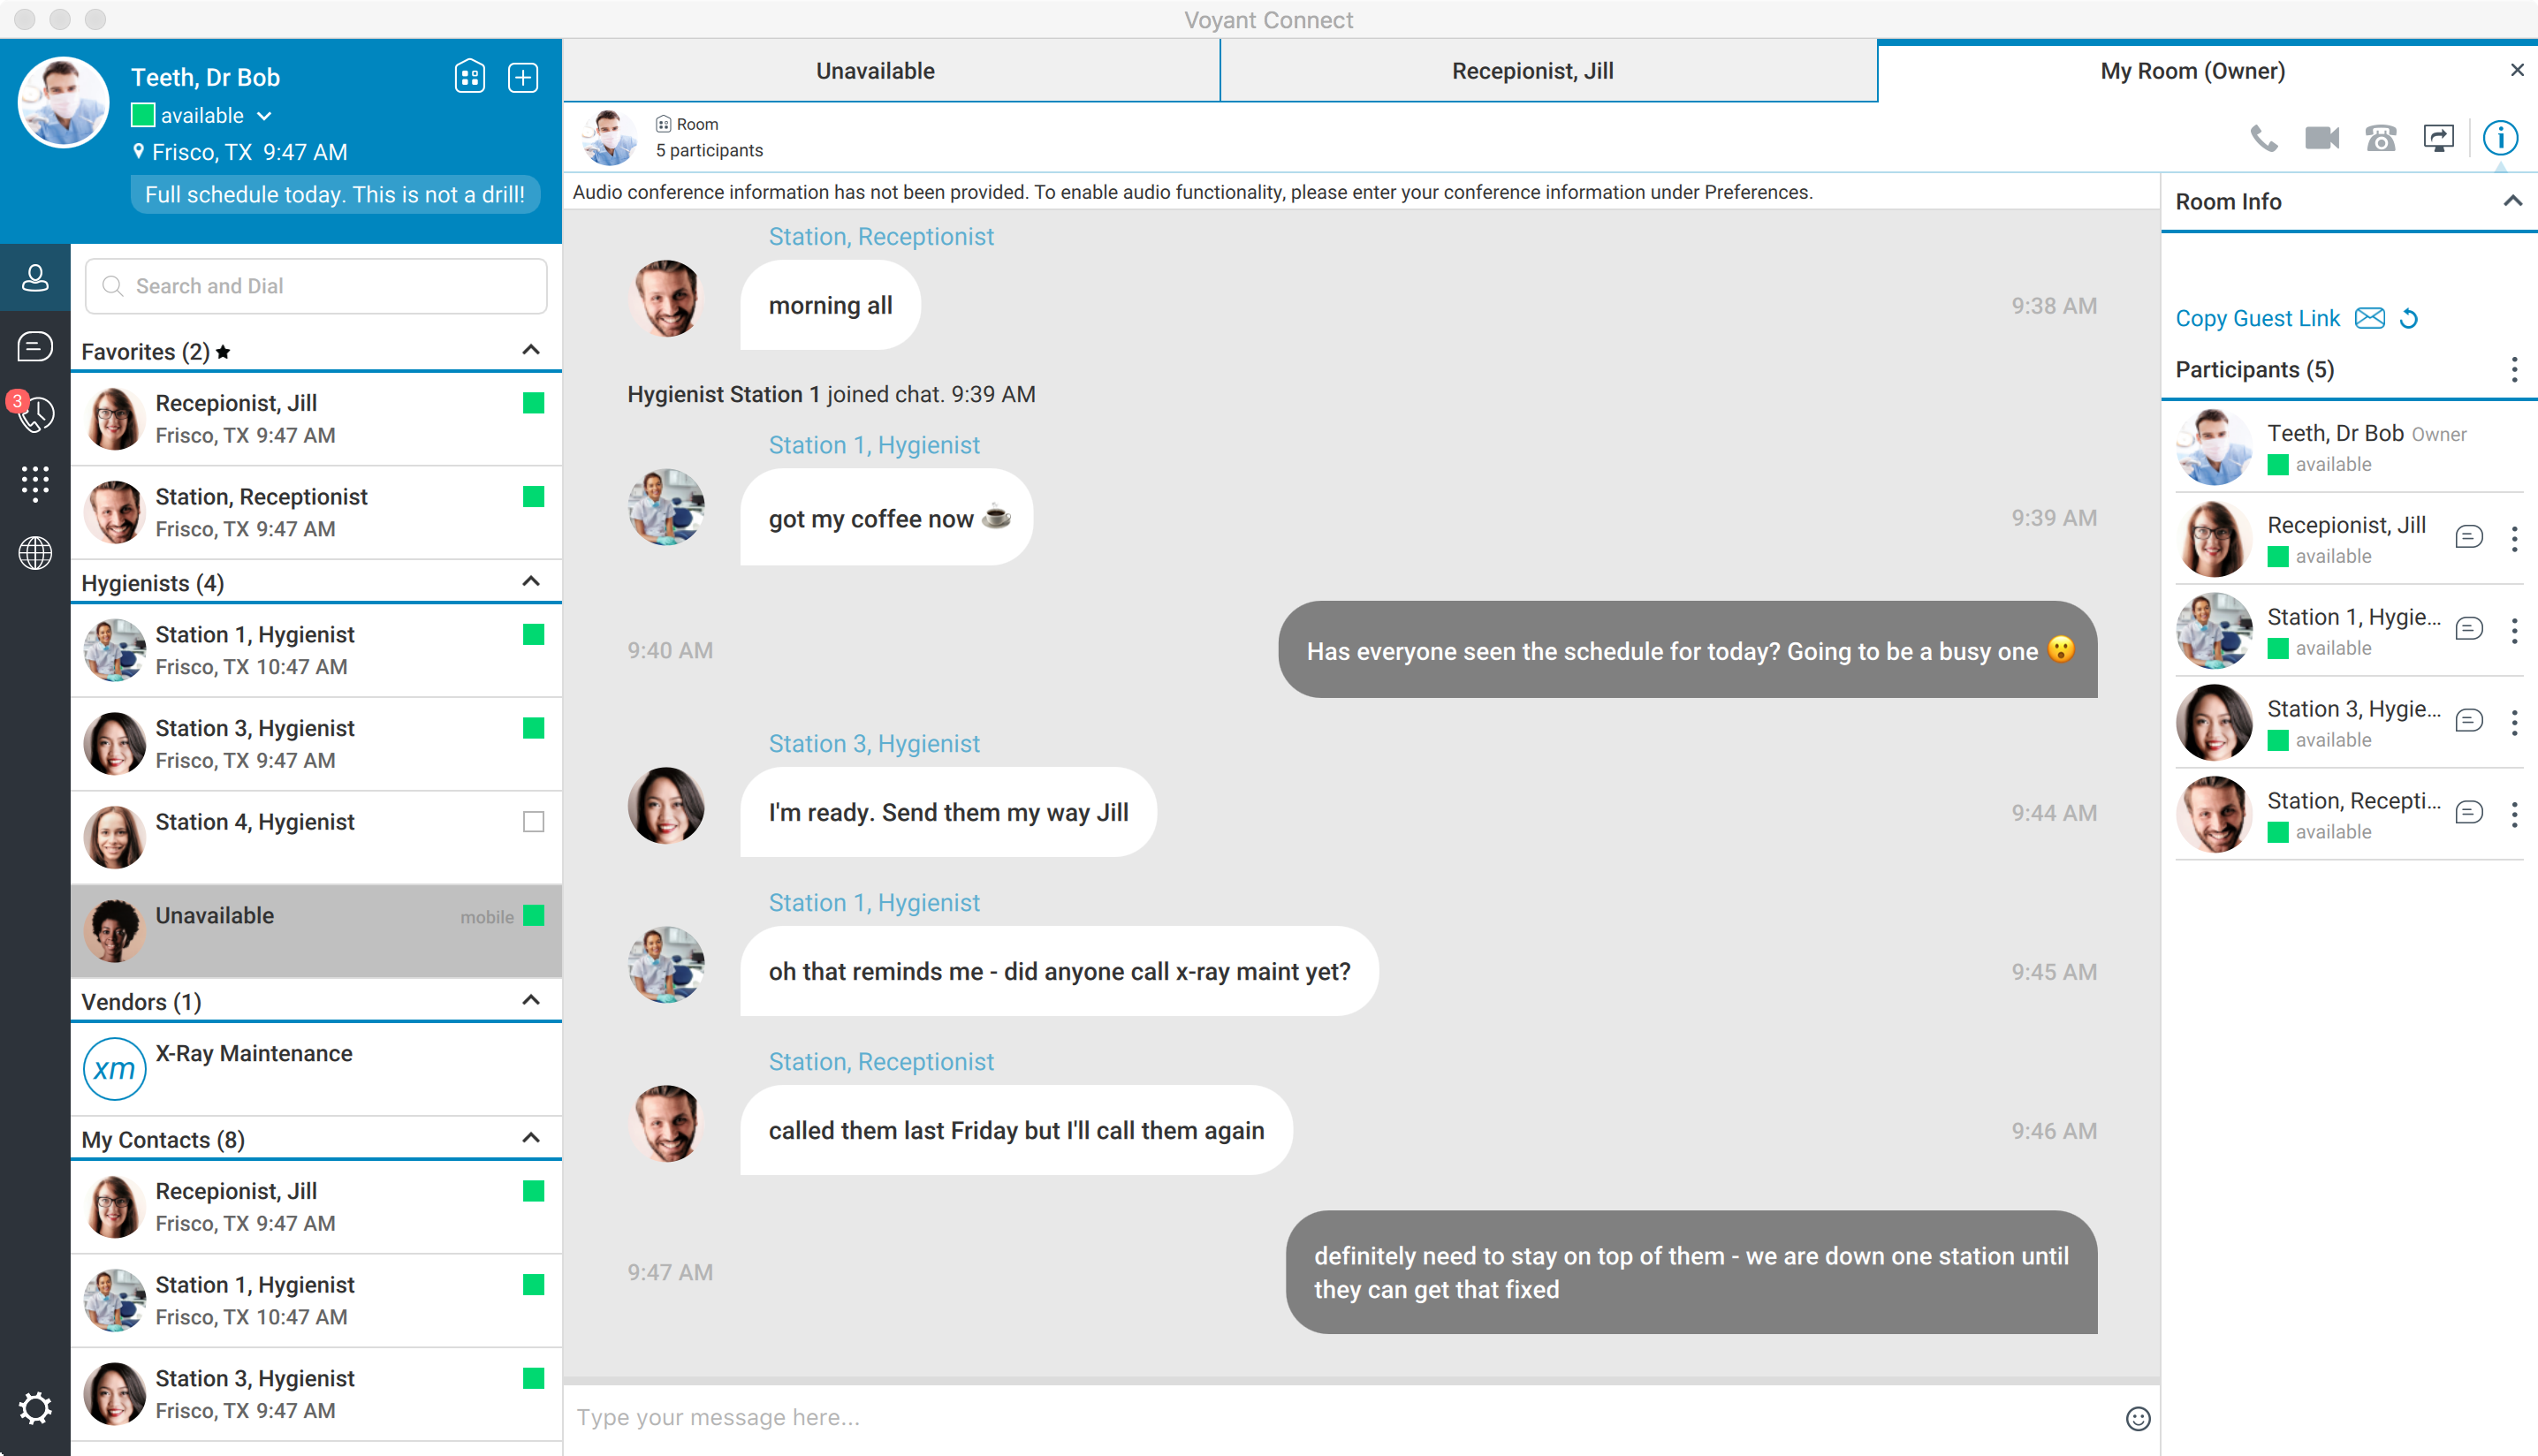
Pressing the MyRoom icon at the upper right of the Voyant Connect program will open MyRoom, which is the group chat and screen share portion.
Note on MyRoom Conference features: Additional services may be required to use this feature. If you do not have access to a conference bridge please reach out to your account manager or sales@voyant.com for more information.

The below video will showcase some of the functions and features within Voyant Connect:
