
This article will walk you through enabling your PBX users to use the Microsoft Teams client for calling
If you currently have PBX users, but also use Microsoft Teams, you can enable those users to use their Microsoft Teams client for making/receiving phone calls outside your enterprise.
Prerequisites
Before you begin, check with your IT administrator to make sure you have the proper Microsoft licensing for your users. Users will need an E5 license, or E1/E3 license with the additional Phone System license applied to any users that should have calling capabilities.
During the configuration process, the Global Administrator for your Microsoft account will need to be involved in the initial setup. The Global Admin role needs to be applied to the user directly and not through a group that has the Global Admin role.
Each user in your PBX that you want to enable for Microsoft Teams must have their actual email address configured on their Customer Administration Portal user account in Administration and Access. The email address is how we match up Microsoft users with your PBX users. If you are building a new PBX and have not created users yet, don't worry. We'll automatically create users for any Microsoft Teams users we find during the setup process.
Connecting Your Microsoft Tenant
To begin, you'll need to connect your Microsoft tenant to your PBX. To do this, login to your Customer Administration Portal, choose the Integrations menu and select Microsoft Teams.
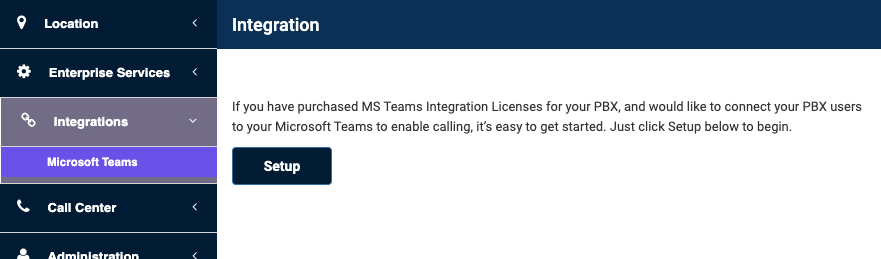
Click Setup to begin.
On the next screen, you will need to enter your Microsoft domain and enter one or more email addresses for your Microsoft Global administrator.
NOTE: In many cases your domain may not be your main company domain. It could be something like maindomain.onmicrosoft.com.

When you click Invite Global Admins, those users will be sent an email with a link. This will direct them to a Ribbon Connect portal where your Microsoft Global Admin will complete the configuration and begin a user sync.
Microsoft Global Administrator First Time Configuration
Only one of the Microsoft Global administrator needs to complete the initial setup process. To begin, click the link in the email you should have received. The link will start with https://admin.rbbnconnect.com.
Logging In to Ribbon Connect
When you first go to this link, your Microsoft Global Administrator will need to login using their Microsoft login.
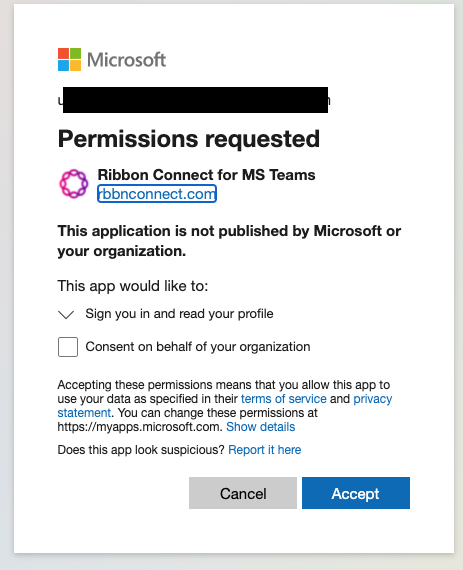
Ribbon Connect redirects to Microsoft for logins, so your credentials are not exposed to either the Ribbon Connect site or the Customer Administration portal. You may be asked to re-authenticate during the setup process and see this sign-in dialog again.
Checking Your Microsoft Tenant
Once you login, you will see the following initial screen:
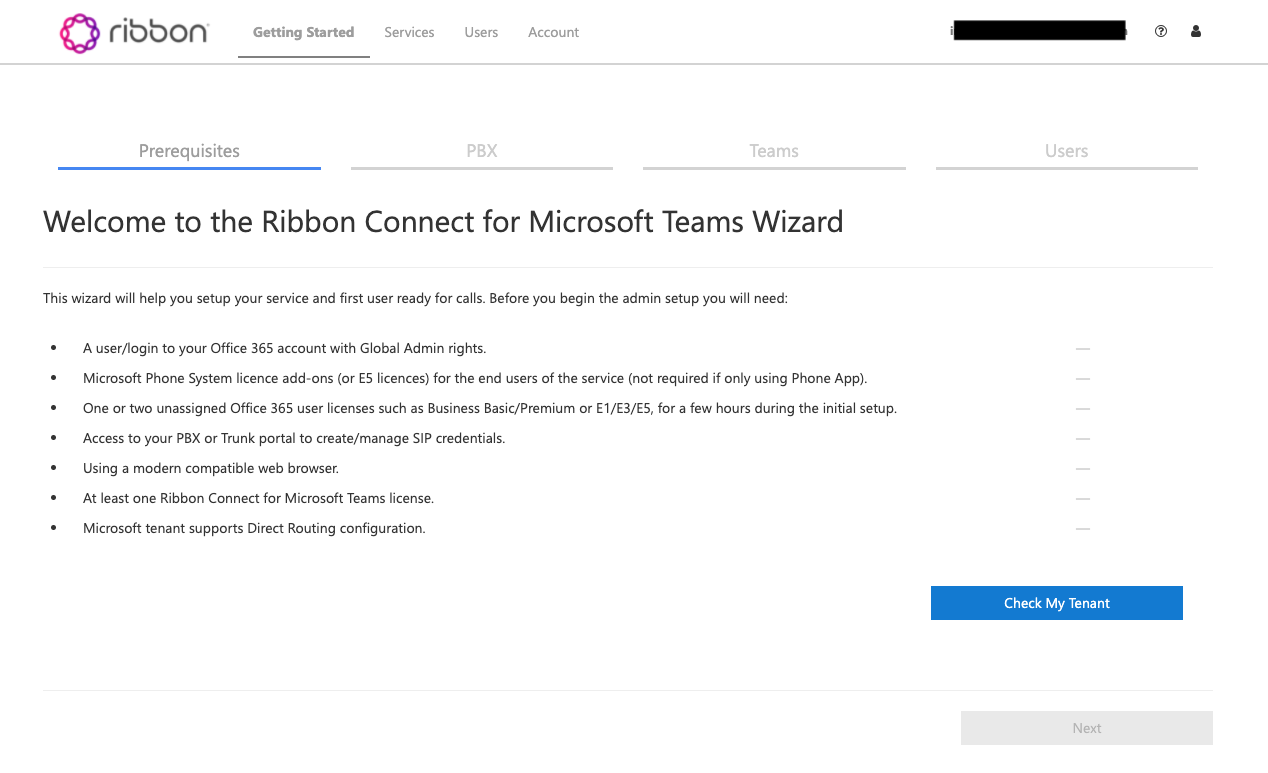
Click Check My Tenant to begin a verification process that will help determine if you have all the correct licensing setup on your Microsoft account. When this completes, all items should have a green check mark on the right.
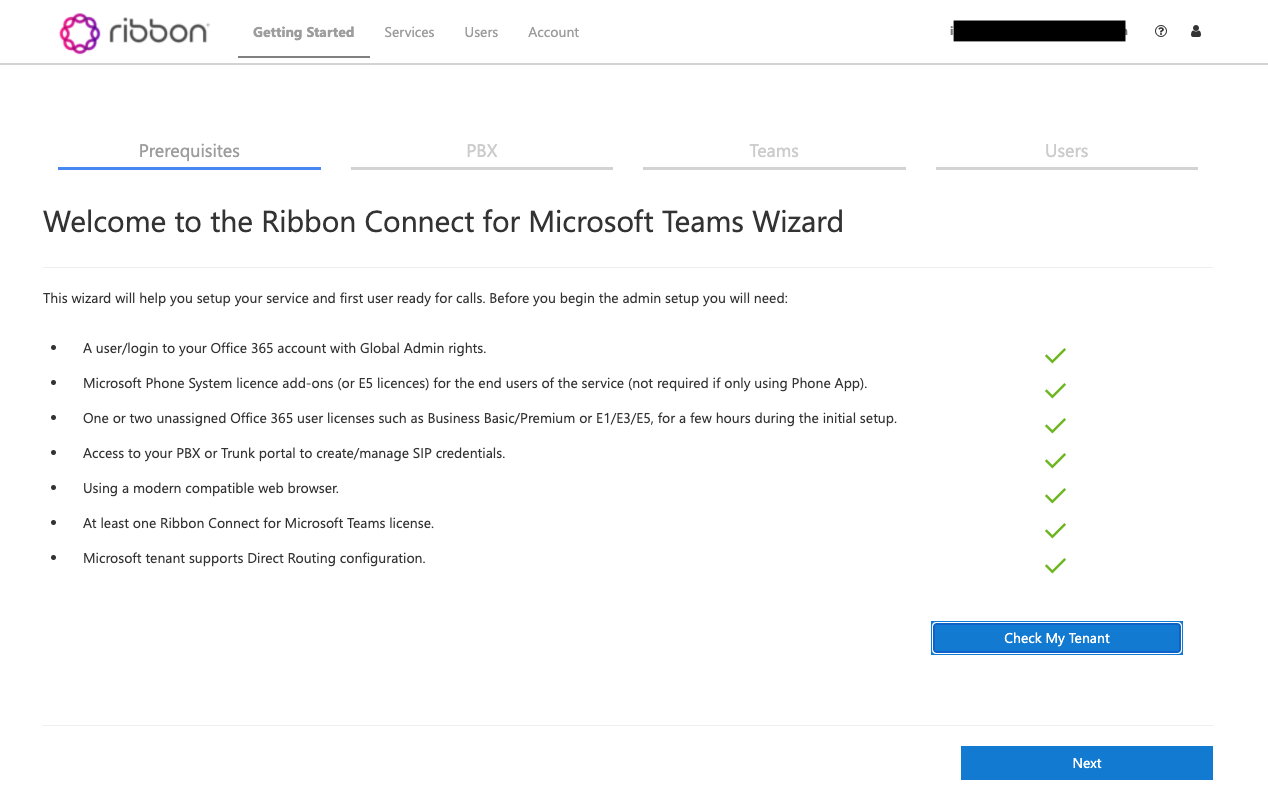
If any items are not checked, please validate your Microsoft configuration for any failed items, or contact support for assistance.
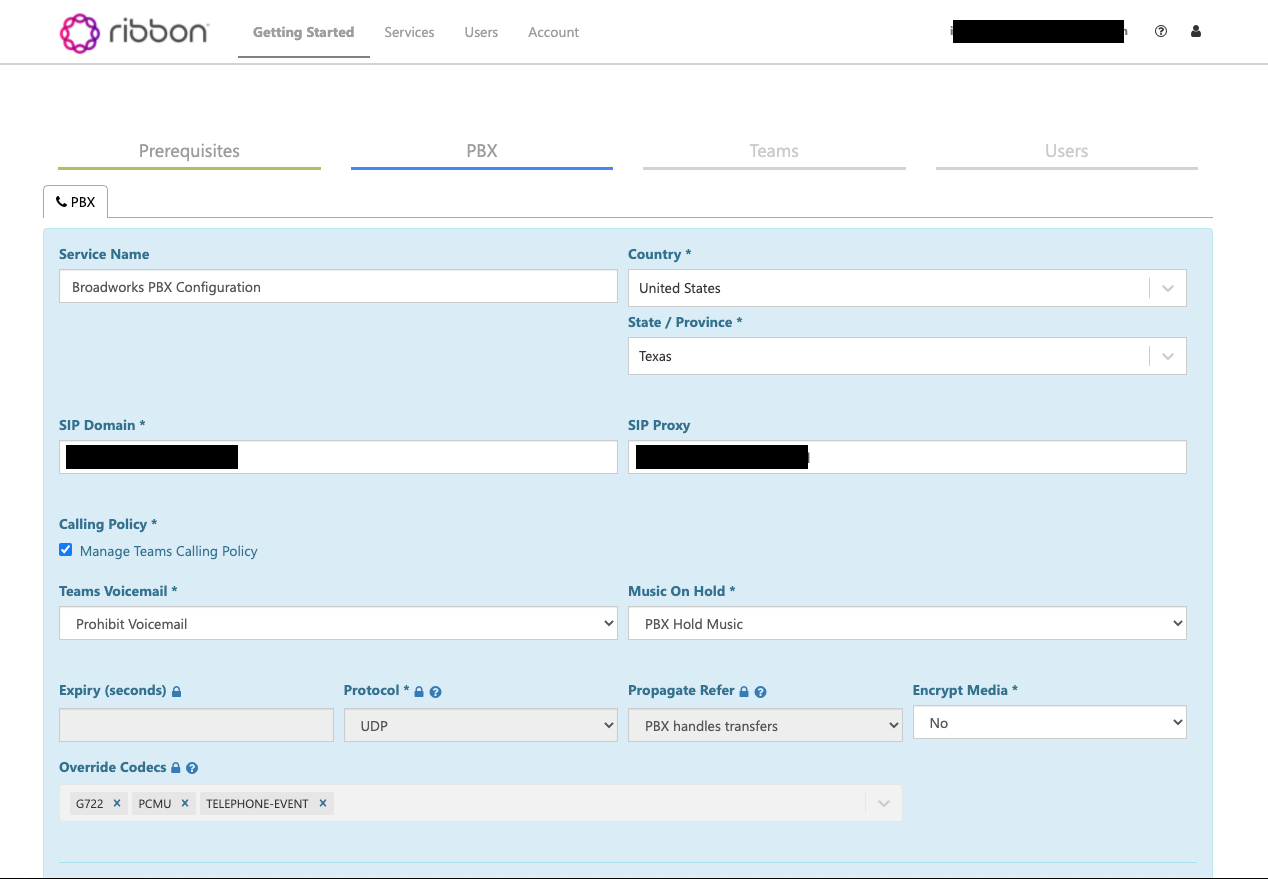
Click Next to continue. The next screen shows information that we have already pre-populated for you. There are no changes here for you to make since that has already been completed, so scroll down and click Next to continue.
Starting Your User Sync
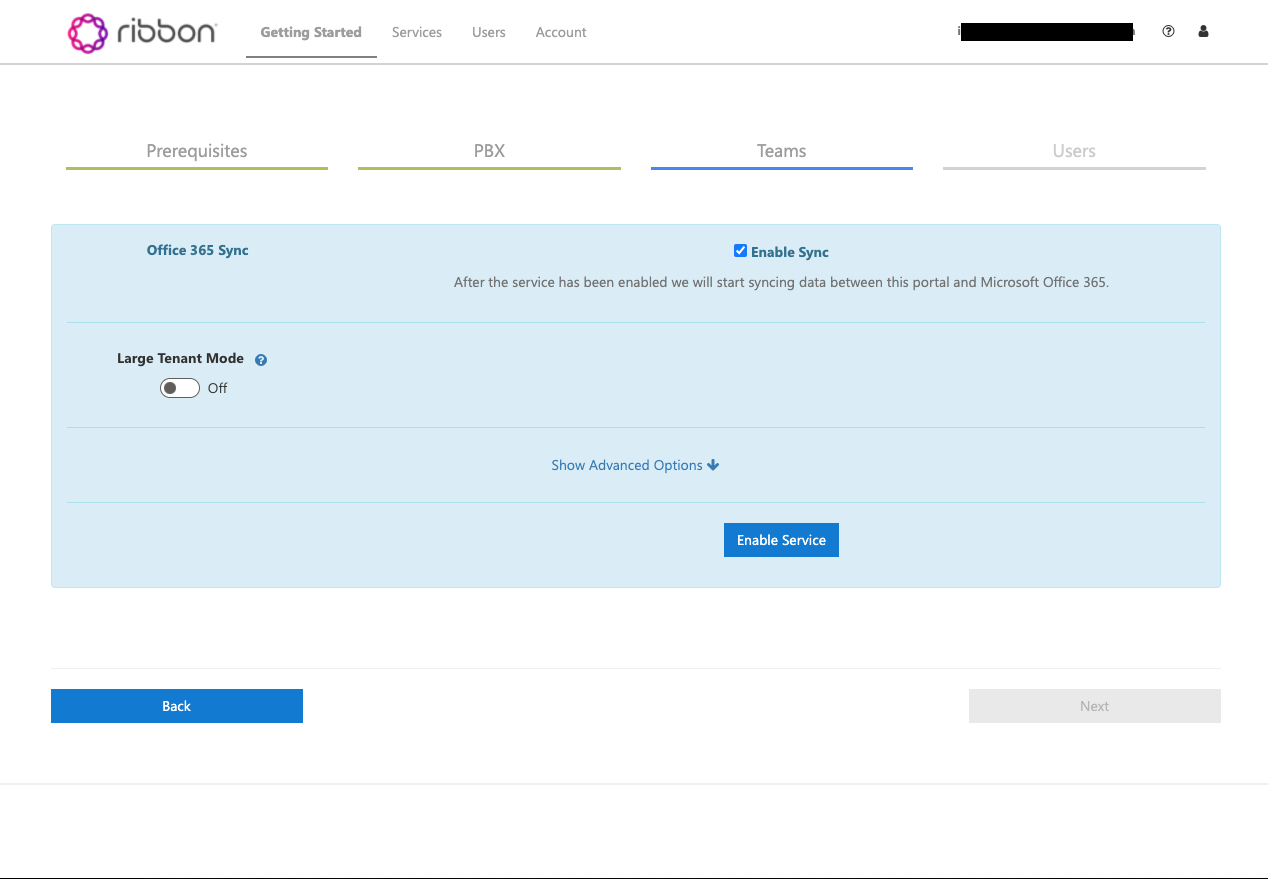
On the next screen, you will need to enable sync so that the Ribbon Connect portal can pull your list of Microsoft users that are Teams enabled. You will likely be asked to authenticate again to perform this task. Click the blue Enable Service button.
The user sync can take some time to propagate between the Ribbon Connect portal and Microsoft. We have seen this take up to 24 hours in some instances, but generally takes a few hours for the sync to complete.
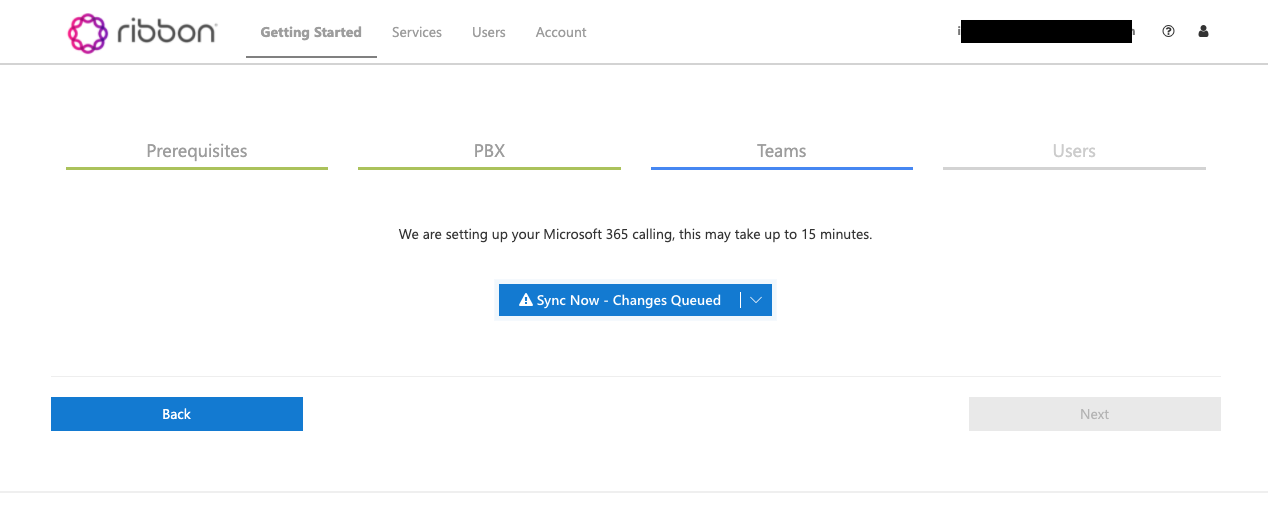
The sync may only partially complete and you might see the following screen:

Just click Sync Now again to restart the sync process.
At this point, you have completed the initial setup tasks and may logout of the Ribbon Connect portal. You will only need to return to this portal if you have added or removed users from your Microsoft account and need to resync the changes.
Continuing the Customer Administration Portal Setup
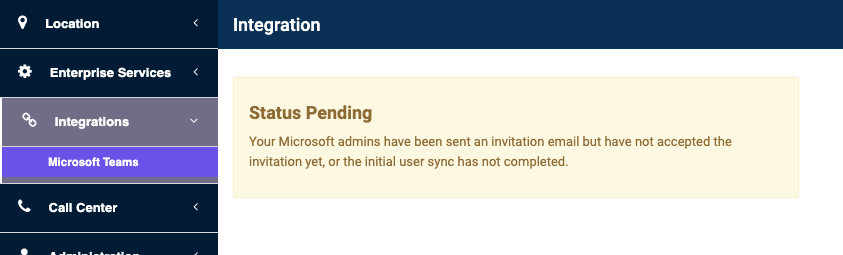
Once the user sync has been initiated, the Microsoft Teams integration menu in your Customer Administration Portal will continue to show pending until at least one Microsoft Global Administrator goes through the above process and the user sync completes.
When the account has been configured and a user sync completed, you'll be able to see the status of the the Global Administrators among other details.

If a Global Administrator has not accepted their invite, the Action column will contain Delete and Resend Invitation as options. If any Global Administrator needs to be removed, click Delete on that user. If you need to add additional ones, click Invite Admins.
To see the status of any user sync requests, click on Sync Jobs.

If you have added new users to your Microsoft account and need to resync, click the Request User Sync button. This will send a new email to your Microsoft Global Administrators with a new link to log back into the Ribbon Connect portal. Once one of them logs back in, they just need to click on the Users tab along the top row and click Sync Now in the Ribbon Connect portal. This will start a new sync job. As before, this could take a while to complete. Check back in the Customer Administration portal to view the status of any sync jobs.
The Configuration menu will show basic information about the configuration between Ribbon Connect and your PBX.
Customer Administration Portal User Management
Creating Users
Once the user sync completes, your Microsoft users will be matched up with your Customer Administration Portal users in the Administration and Access menu. The matching occurs based on the email address configured for those users. If you have not created users yet, we automatically create new users with the first name, last name email address for each Teams-enabled user from the user sync. A phone line is not assigned to these users yet. Any user that was imported from a Microsoft account will have a Teams icon next to their name.

If you had already created users and want to continue with those, but those users are currently assigned a different or generic email address, you will need to update the email address on the existing user to their Microsoft email address. The email address on the user must be valid in order to enable the Teams integration.
If you just update existing user with their Microsoft emails, you can delete any automatically created users if those are no longer needed.
Assigning Services
If the sync added new users and you want to use the auto-created users, complete the steps below. Otherwise, go to the Assigning the MS Teams Client Integration License to finish setting up your existing users.
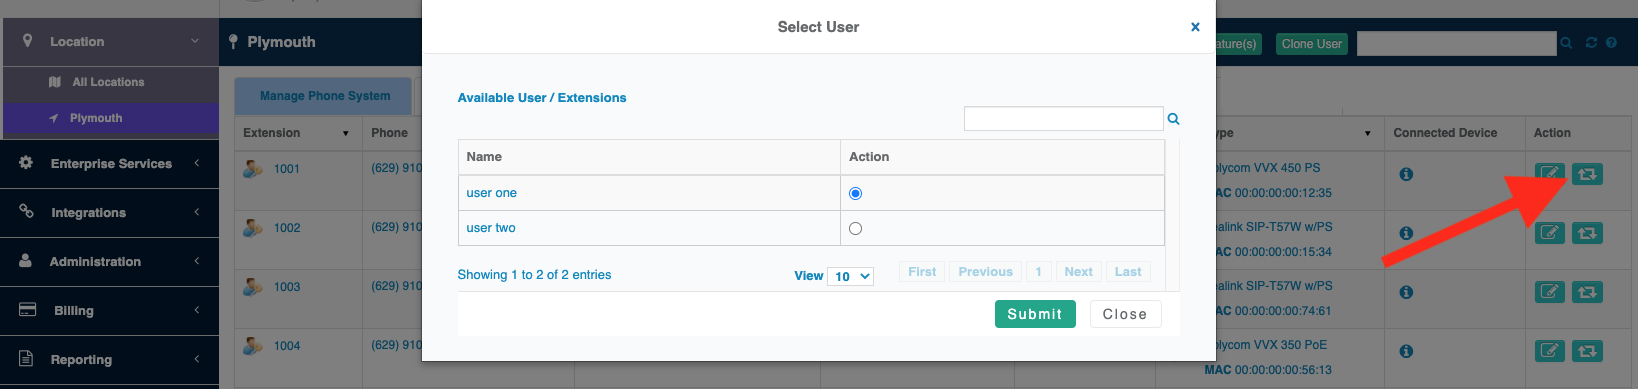
To assign services to a user, choose the Location that has the extension and phone number you want to assign to this user.
On the right-hand side of that service, choose Reassign, then find the user in the list of users. Choose that user and click Submit.
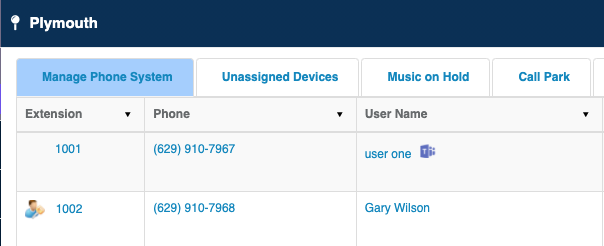
Once the user is assigned a service, the Teams logo will show next to the user to indicate this service is assigned to a user with a Microsoft Teams service.
Continue assigning any additional users to their respective extensions/phone numbers.
Assigning the MS Teams Client Integration License
The next step is to assign an MS Teams license to the user. This will create the necessary information in the PBX and push the changes to Ribbon Connect so that all systems now have the complete set of data needed.
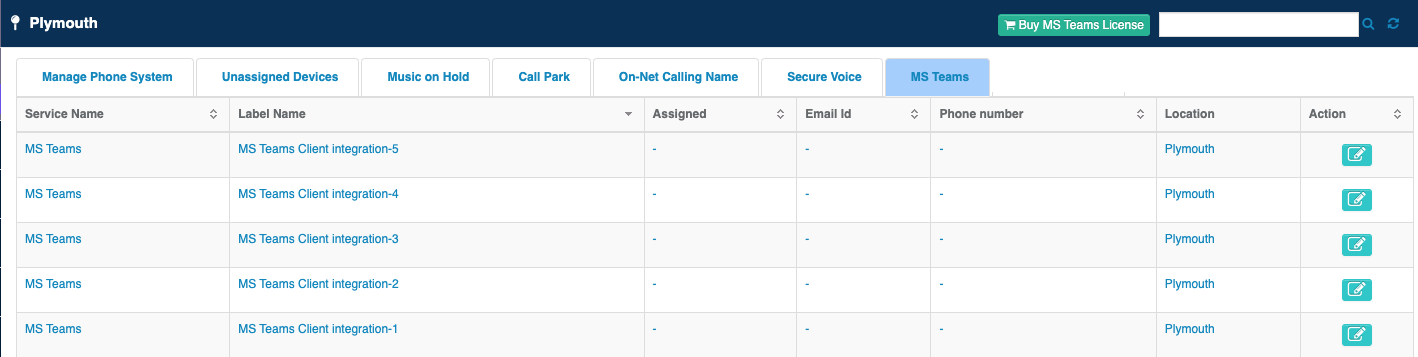
Click on the MS Teams menu in the Location for the users. This will show the current list of MS Teams Client Integration licenses that have been purchased for your PBX. If you do not have any, you can either contact Sales to add those, or, click the green Buy MS Teams License button if that is enabled for your PBX. This will allow you to add licenses as you need them. The licenses will be added to your bill. The price per license is noted in the pop-up.
If you buy one license, the license will be immediately added to your list to assign. If you buy two or more, the request will be queued. Check back in about five minutes and the new licenses should be available to be assigned.
Once you have licenses available, click the Assign icon on the far right. Just choose any license. In the pop-up, choose the user you want to assign this license to. Note that only users that have the Teams icon next to them in the Manage Phone System page will show in this list. Users that already have licenses assigned will also be removed.
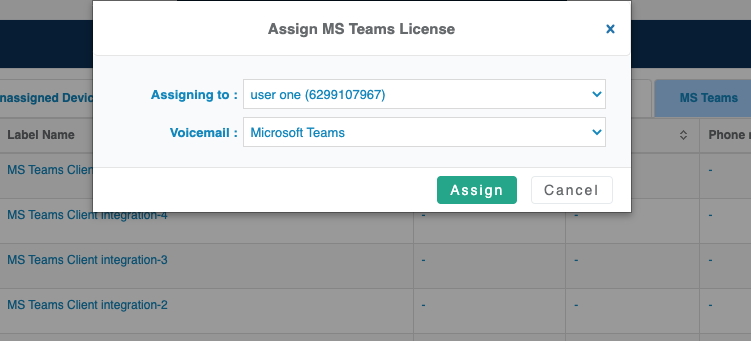
You also have a couple choices of Voicemail options. If you have a desk phone, you will want to choose Cloud PBX as the voicemail option so that you can retrieve voicemails from either your Teams client or from your desk phone. Click Assign to complete the license assignment. Do this for the rest of your users.
Once users are assigned the Teams license, another Teams icon will appear in the Connected Devices column letting you know the user can now have a Microsoft Teams client as a device. The "i" information icon can also be used to verify if there is a current registration between the Ribbon Connect service and our service.
Microsoft Teams Calling
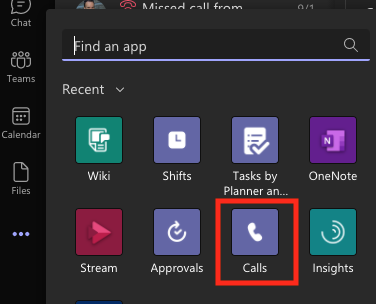
At this point, the user should log out of their Microsoft Teams client and log back in. Depending on what options your Microsoft Administrator has configured, you should now see a Calls option.
Once you select calls, a dialpad will appear allowing you to call anywhere your current PBX service allows you to call. You can also receive inbound calls to your phone number.
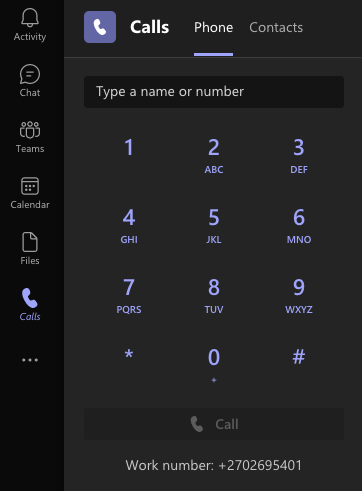
If you are not seeing the Calls option, contact your local Microsoft Administrator to determine if the feature is correctly configured on your account.