What to do when you first login to the Webex app
When you first login to the Cisco Webex app, you'll find there are a ton of things to explore. So here are a few things to check out:
- Initial login screen
- Exploring the menu options
- Appearance
- Spaces
- Calling
- Voicemail
- Calling settings
- More information
Initial login screen
When you first startup the app, you'll be presented with a sign in screen. This is the same for desktop, mobile and tablet clients.
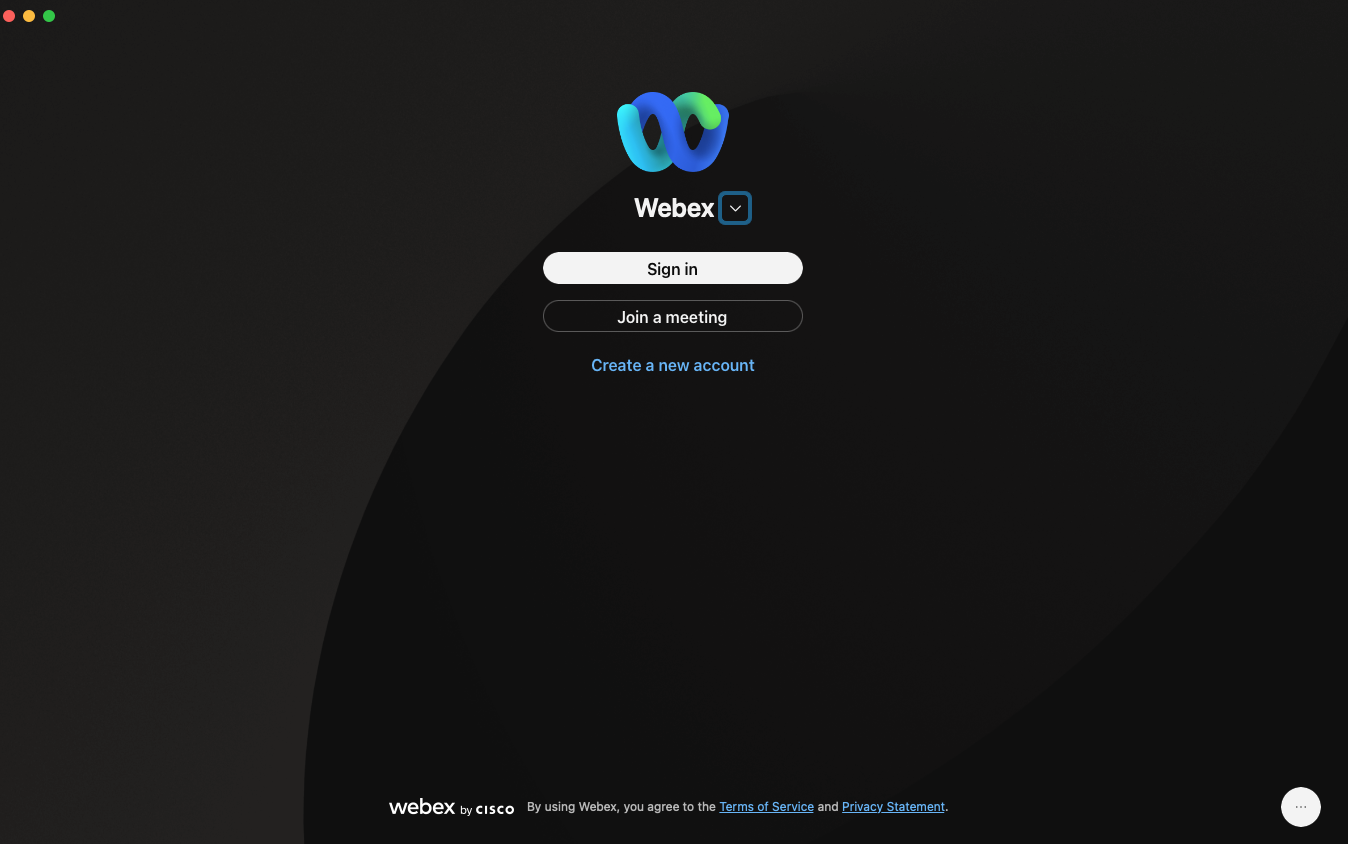
Click Sign In, then enter your username and password when prompted. On initial login, you'll see a couple pop ups on 911 calling and connecting to a Cisco Room OS device.
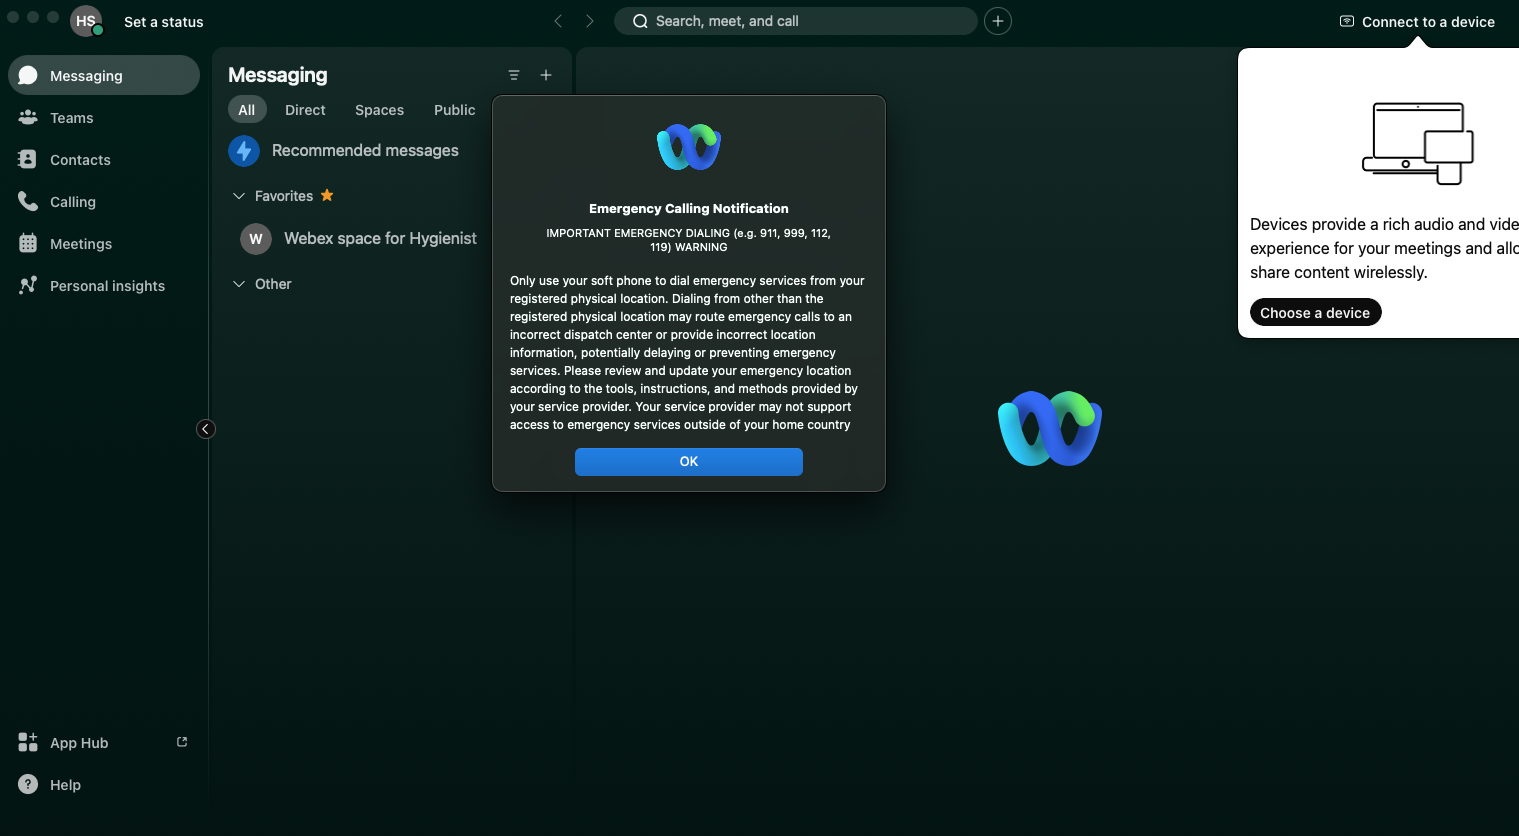
Click OK and close the Choose a device dialog.
Exploring the menu options
On the left are the main sections of the Webex app.
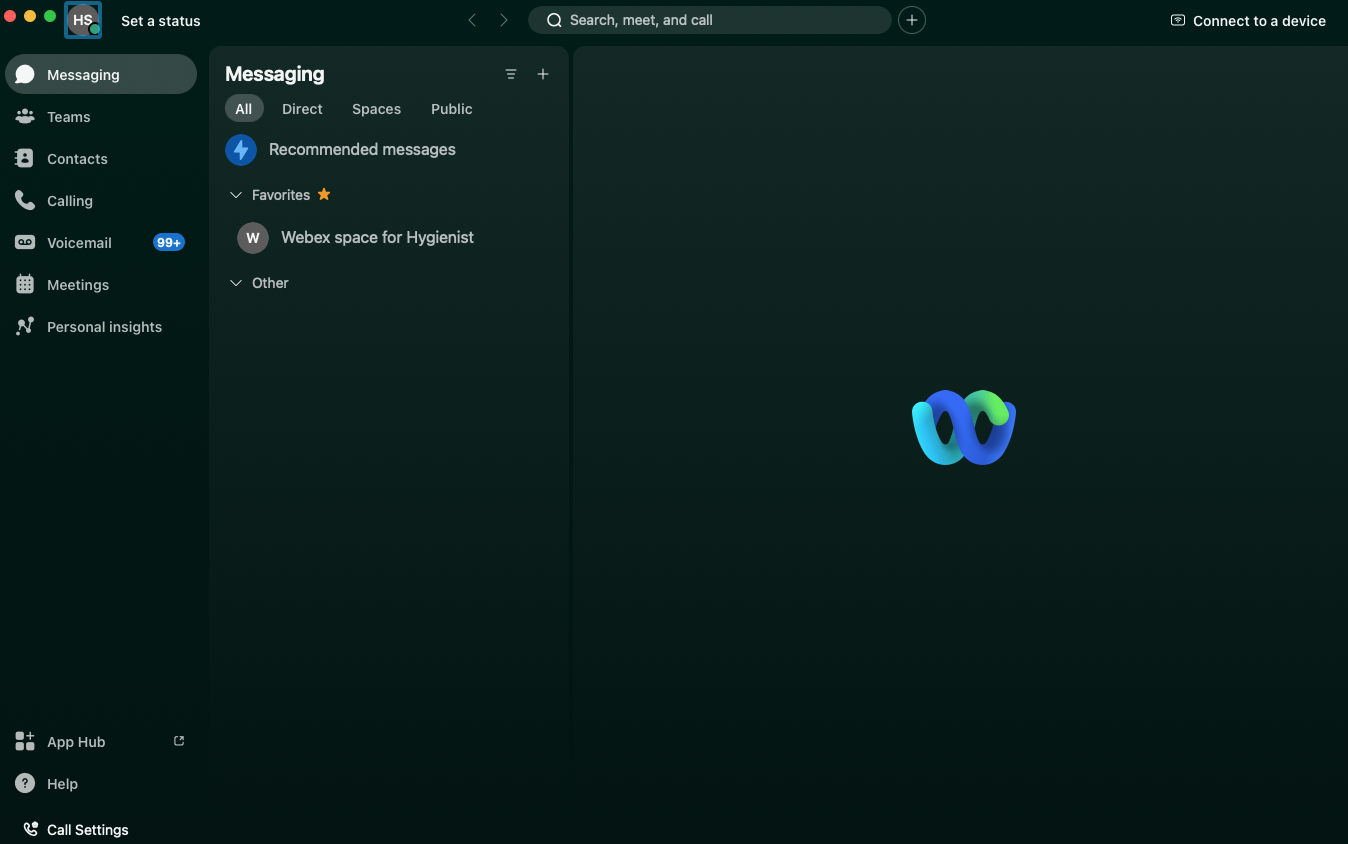
Initial profile and status
In the upper left of the Webex app, you can click the profile icon to customize your profile, then click Set a status to update your status at any time. Other users will see this status.
Messaging
The messaging menu is where all chat communications occur and is typically the default page view when you login. You'll notice you have a Webex space already created for you that is your own personal playground to experiment with.
Teams
Teams allow you to create and organize spaces for things like projects or departments rather than having everything be a linear set of spaces in your view.
Contacts
Contacts can be added into some pre-defined groups, or create your own group. Custom contacts and personal list contacts will be searchable here, but these do take time to propagate into the Webex cloud.
Calling
The calling menu provides access to the dialpad and call history. Your assigned phone number will be shown above the dialpad. Incoming calls will start ringing your Webex client once you login.
Voicemail
The voicemail menu will show all your current voicemails and let you listen to them directly in the app.
Meetings
The meetings menu is where you'll go to schedule meetings and view your meeting calendar.
Personal insights
Personal insights is an optional feature you can turn on at any time. This provides information on how you are using Webex.
App Hub
A number of companies build add-ons to the Cisco Webex app. App hub will help you find something you may already be using, or some additional tools that help your productivity.
Help
The help menu provides quick access to help articles.
Call Settings
Call settings provides direct access to many of your calling features such as call forwarding and other settings.
Appearance
First things first. Color preferences are found by clicking the profile icon in the upper left, then choosing Settings. Click on Appearance from the dialog menu. Here you can choose your color scheme and other appearance preferences.

Spaces
Spaces are the key building block of the Cisco Webex app. Any user can create a space and invite other users to join. To create a space, click the + icon, then choose Create a space.
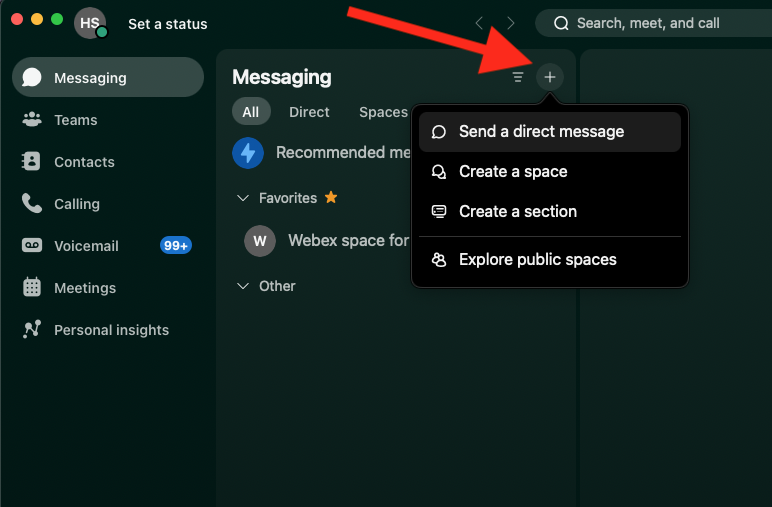
You can name the space, then invite other users to it by searching for their name or email address they used for their Webex account.
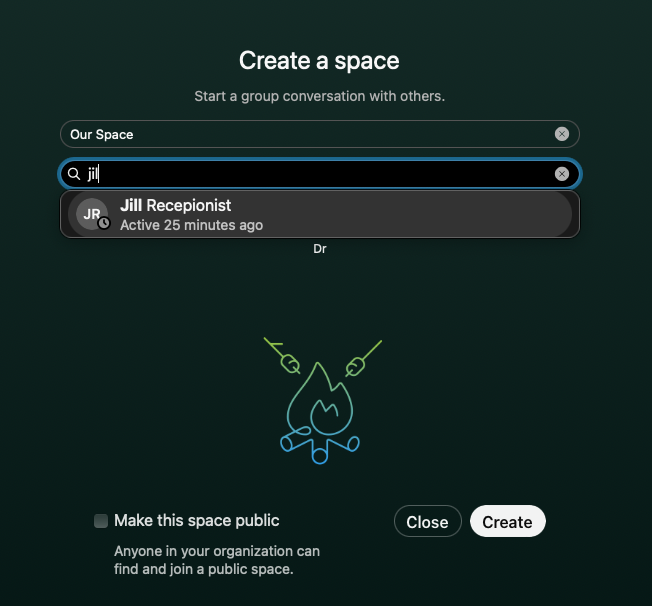
Once you've created the space, you'll see it in your list, and can start typing a message.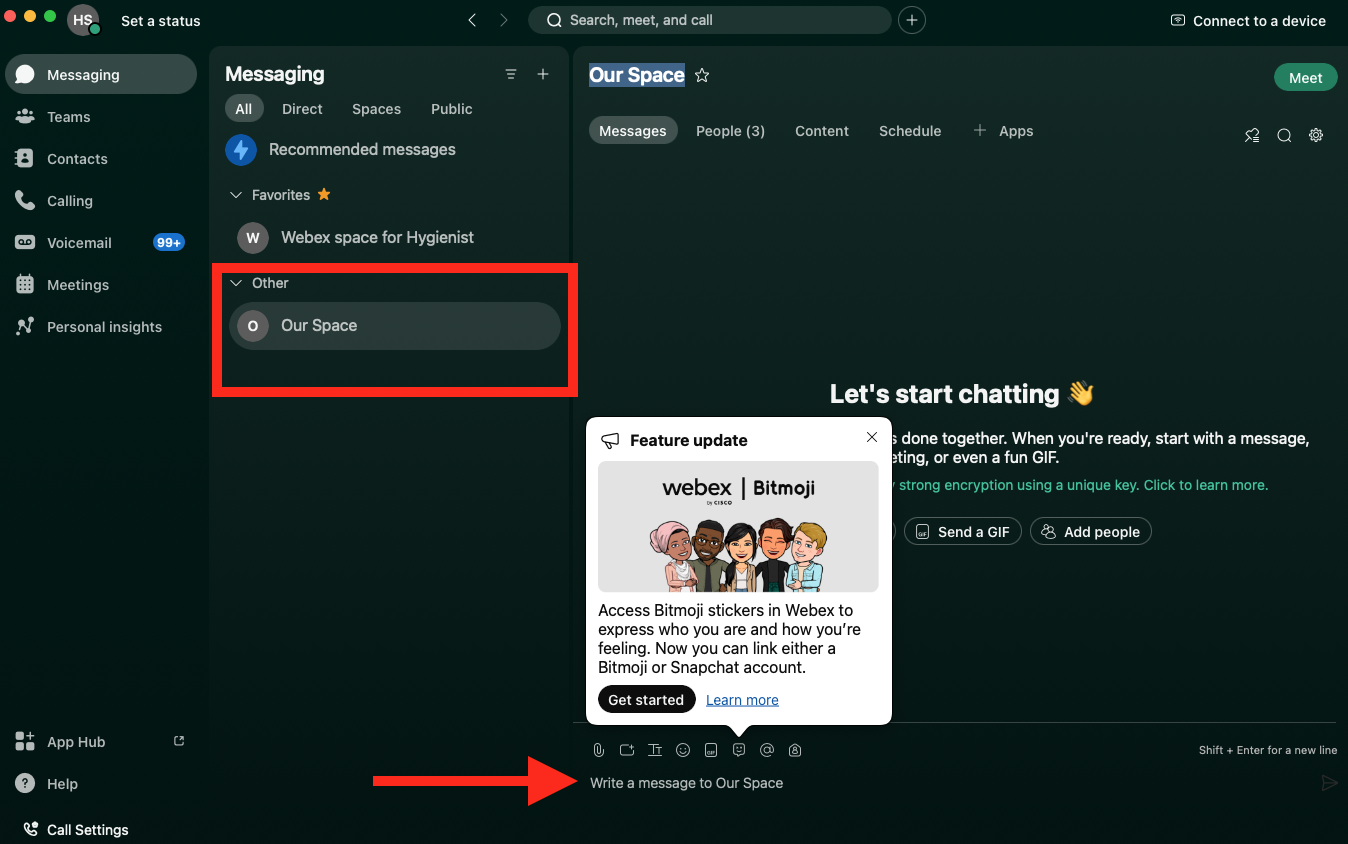
You can type text, drop documents and add emojis to your messages. You can search the list of emojis to find just that right one.
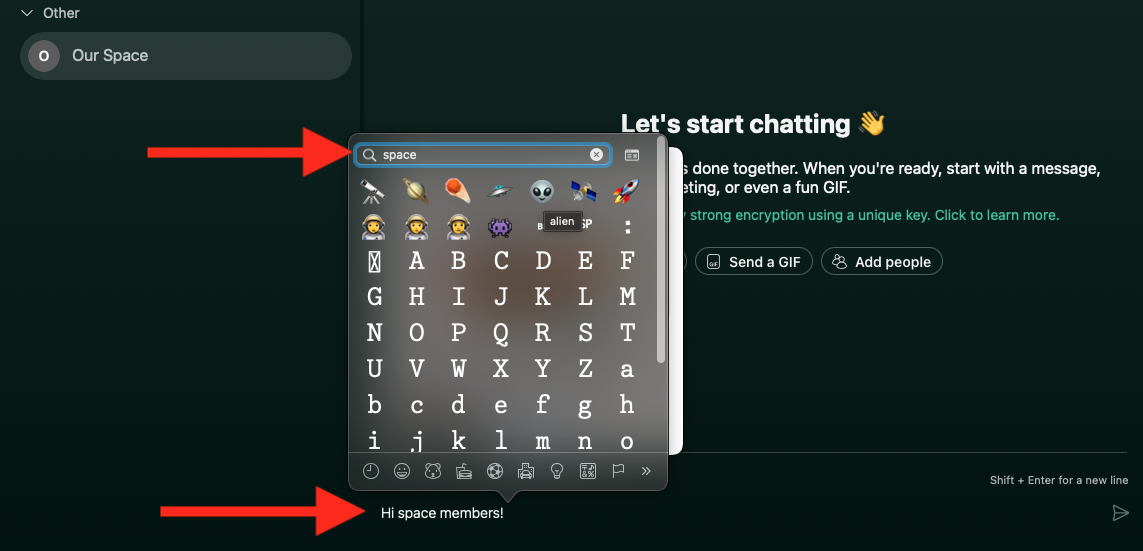
Click the send button on the far right to send your message to your new space.
Calling
The calling menu is where you'll handle all incoming and outgoing calls to outside people. Call history is separated into All and Missed categories. The small phone and dialpad icons can be used to pull the call to this client or bring up the dialpad at any time respectively.

Your assigned phone number will show above the dialpad. To place a call from the dialpad, enter the phone number or start typing part of a name for matches to any users or contacts.
Voicemail
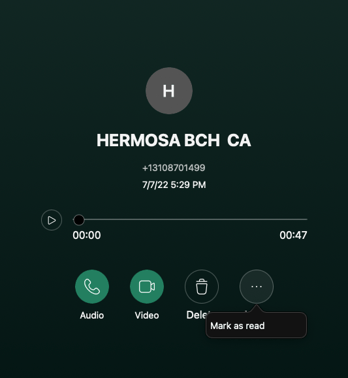
Voicemails can be fully managed from the Voicemail menu.
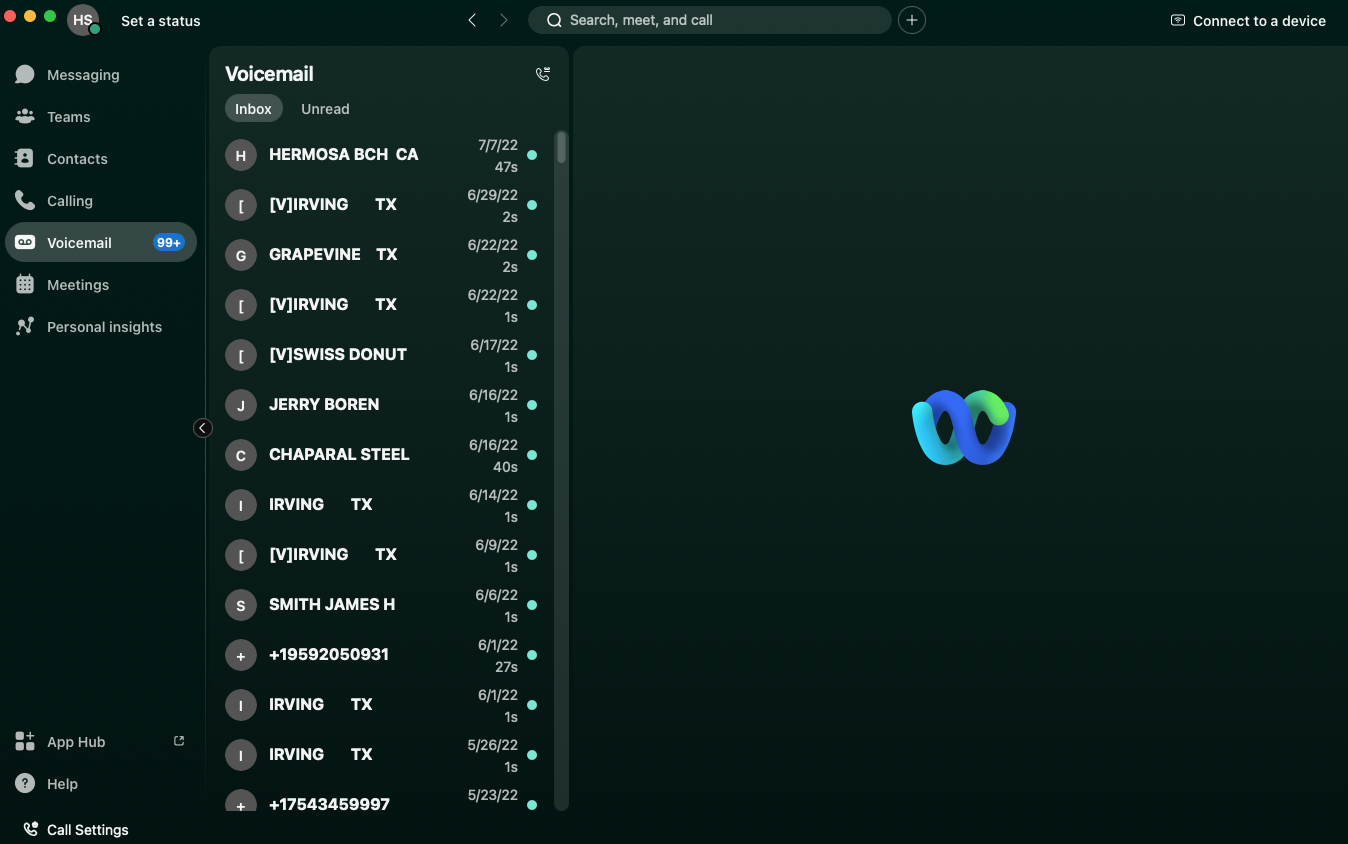
Selecting any voicemail will bring up an option to play, delete or mark the voicemail as unread.
Calling settings
To access call settings, select call settings in the lower left corner, then choose Open Call Preferences.
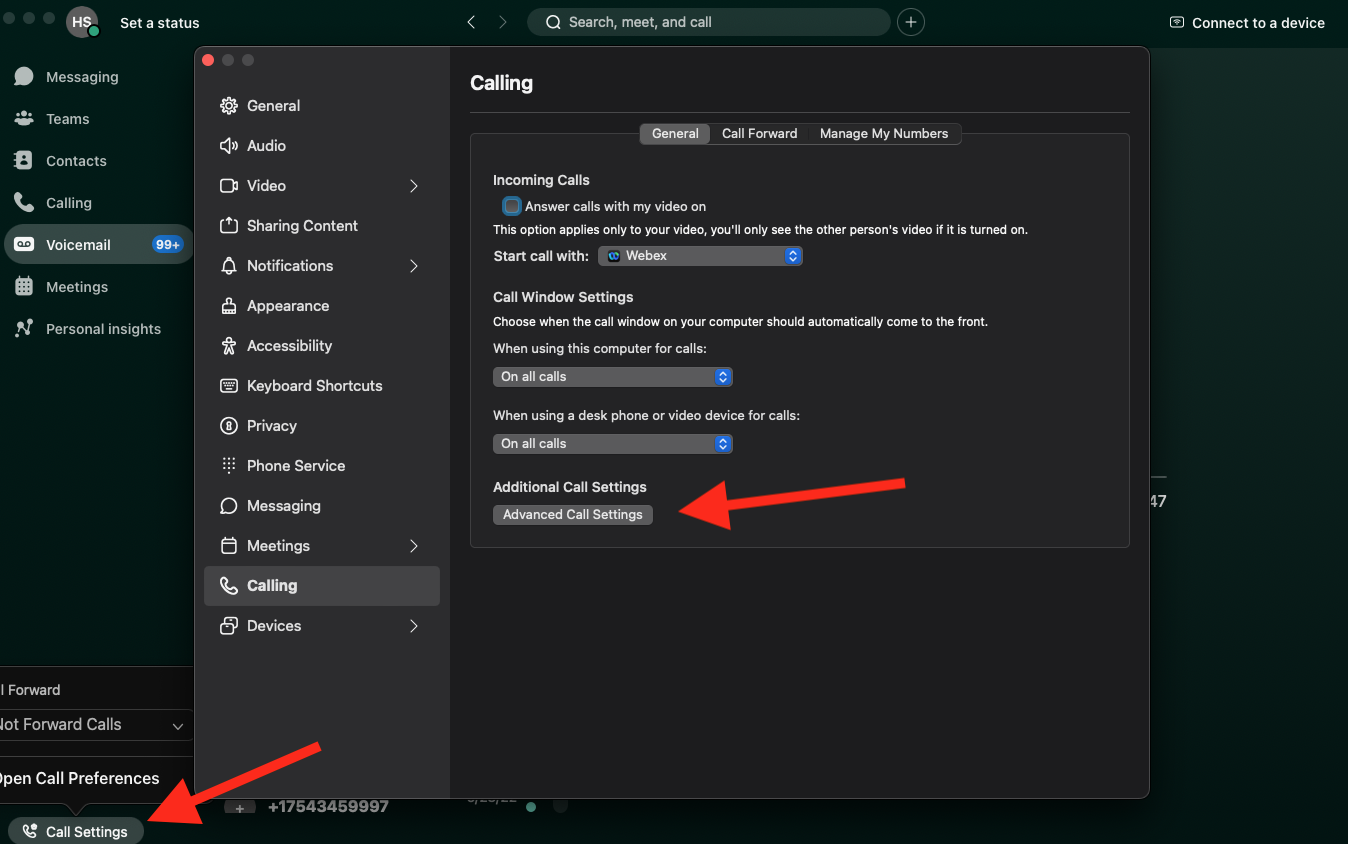
This will bring up a dialog with some quick changes you can make to your call settings.
Click Advanced Settings to get access to more of your calling features.
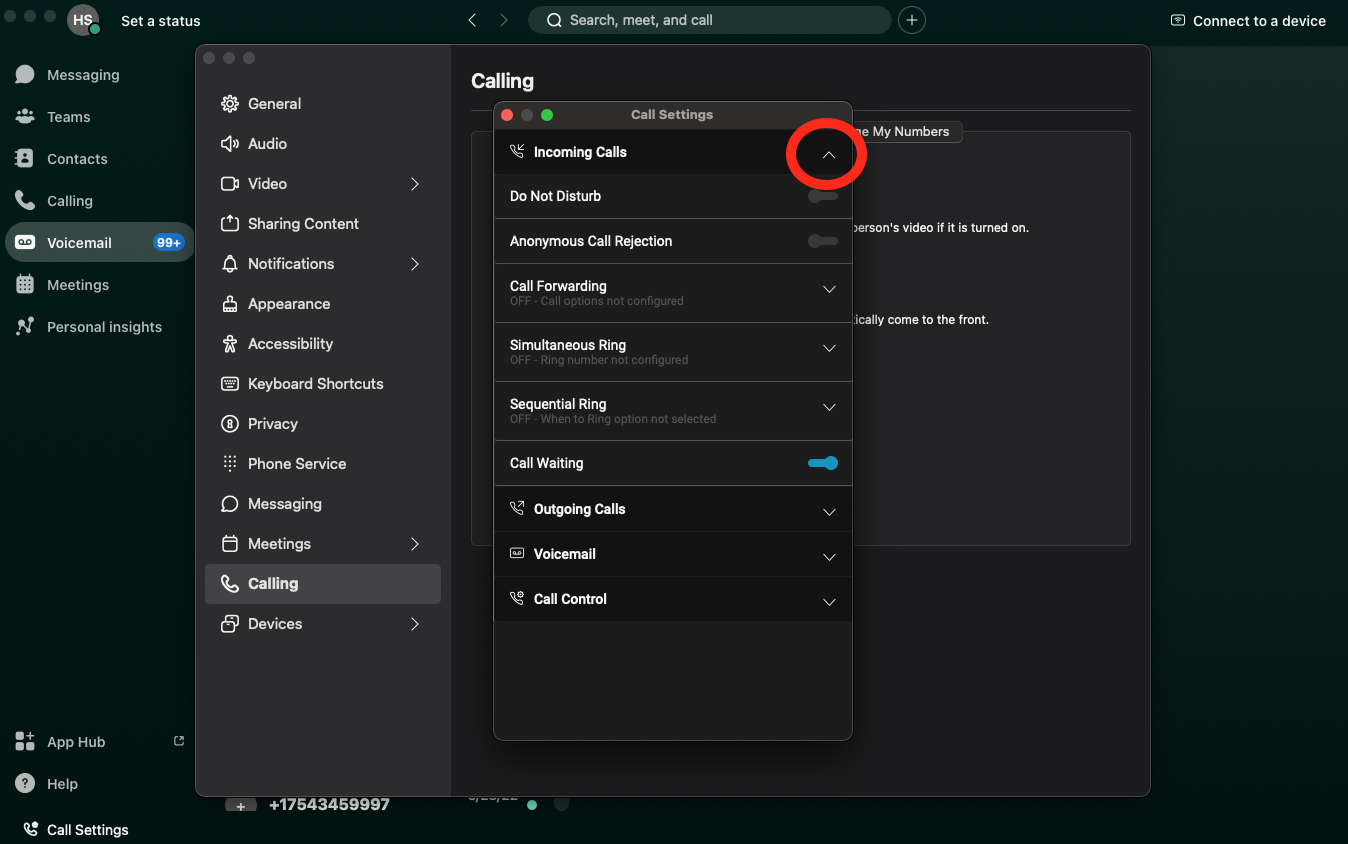
Each of the sections can be expanded or collapsed with the arrows.
If you are a call center agent, your availability and other options will be in the Call Control section.
More information
Cisco provides more in-depth help articles on many features of Webex.
