New Features and Updates for the Customer Administration Portal
On May 18, 2020, Voyant will make product updates to the Customer Administration Portal to include new features that enhance user functionality and improve user experience.
OVERVIEW OF NEW FEATURES
Duplicate Extensions Now Available for Users
Originally, your PBX was restricted to only allowing one unique extension across all customer locations. This release introduces a new feature where a PBX can be permitted to have duplicate extension numbers assigned to users in one or more locations. Duplicate extensions cannot be allowed in the same location.
This feature allows for better support managing larger customer’s retail locations within one PBX, where each location group represents an individual store, for example. Each location can be a duplicate of the other with the same seat names and extensions.
To view the current extension status in your PBX, a new information icon is available in the Customer Administration Portal.

If duplicate extensions are not enabled, the message will read as:

When duplicate extensions are allowed, the message will read as:

Once enabled, users can have the same extension in multiple locations.

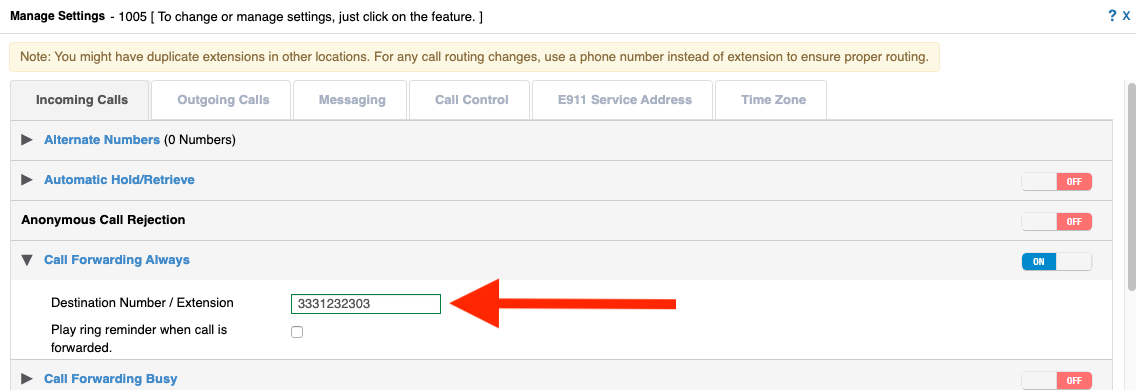
Many other places in the Customer Administration Portal have also been modified to make it clear which extension is being chosen for many call routing options. For example, when setting up a menu in an Auto Attendant to transfer to an extension, more detailed information is now listed so it’s more obvious which of the multiple extensions is being chosen. These details include the username, location, DID and extension. Additionally, a note is included at the top of each configuration screen as a reminder that the duplicate extensions might be in use.

In any fields where an extension entry box exists, it is highly recommended to use the telephone number to route the call to versus using the extension. Choosing an extension that exists in multiple locations may result in unpredictable call routing.

The additional details are added to many other configuration screens including Virtual and Toll Free number assignments, Announcement Repository for users and many other settings to make choosing the correct user easier to complete.
Advanced Call Center: "On Personal Calls" New Option
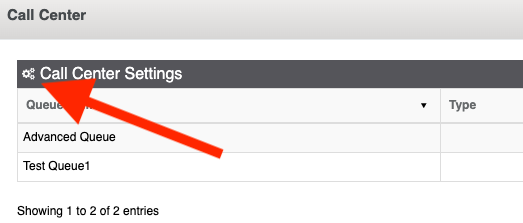
A new option for Advanced Call Centers is now available within the Global Call Center settings. Select the gear icon to open the settings.

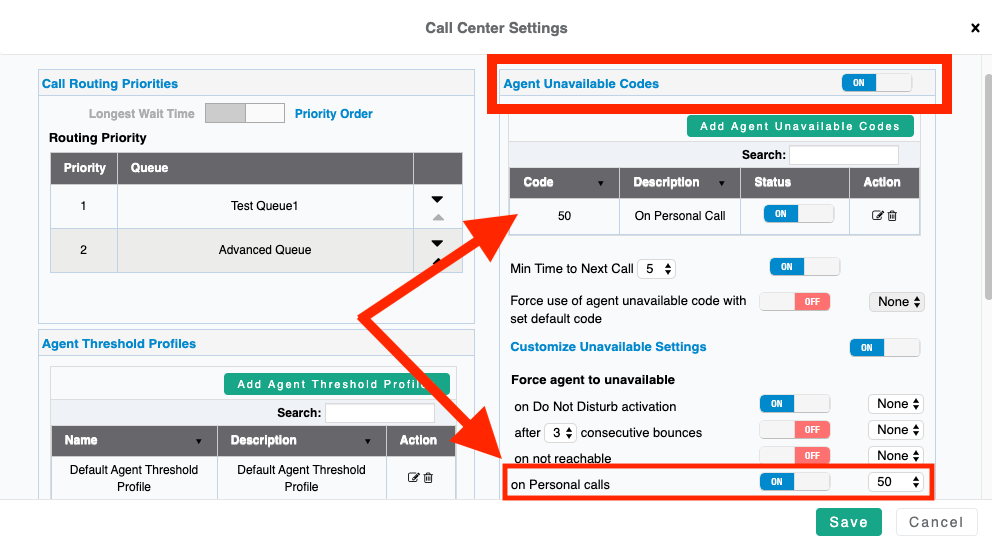
The “on Personal calls” option will force an agent into an unavailable status while making or receiving a call outside of the call center. An Unavailable Code must be created and the Agent Unavailable Codes setting must be enabled for the option to take affect.

Virtual Numbers Pointed at Users Now Available to Use as Caller ID
When selecting a DID to use as the outbound calling line ID for a user, the list of available numbers to use was restricted to numbers that were pointed at services. The list of available numbers to use has now been opened up to include any DID that has been pointed at a user and will be listed as an Alternate Number:

This allows for cases where a DID may be pointed at a Receptionist user, which was then preventing this number from being assigned as the outgoing caller ID for users. Now the number will be listed in the drop-down selection for both individual users and within Bulk Update for Calling Line ID.
Scheduled Deletion Options while Utilizing FTP/SFTP/S3 Configurations for Call Recording and Hosted Fax
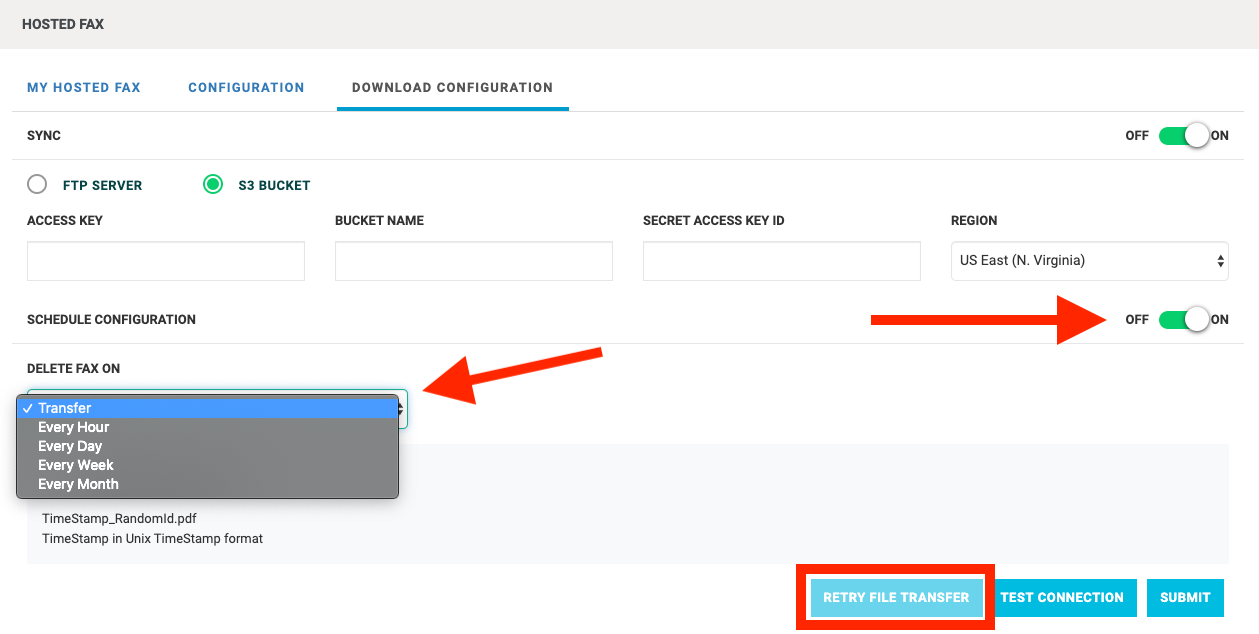
Call Recordings and Hosted Faxes can be configured to be transferred to your own storage via FTP/SFTP or an Amazon S3 account. However, the files still remain available within the Customer Administration Portal and have to be manually deleted to prevent being billed for overages. With this release, the option to set a deletion schedule has been added. This option can be enabled on either the Hosted Fax or on the Call Recording screen. Once enabled, a “Delete Fax On” drop-down becomes available.

These options will allow you to either immediately delete the file once it is successfully transferred, or perform a cleanup once an hour, day, week or month. Only files that were successfully transferred will be deleted. The scheduling options allow you to keep this in the Customer Administration Portal for easy access until they are deleted. If files fail to transfer for three attempts, that will be noted in the Transfer Status column below. If you have files that failed to transfer, the Retry File Transfer button above can be used to retry any failed files.

Failures may occur if the FTP/SFTP site is down, storage space runs low, credentials are changed or for many other reasons. Files will not be deleted until they are successfully transferred.
