
Creating and managing users
Creating a new user
In order to invite an individual to the App, an account must be created for them. When inviting a new account, you can assign them one to one of three role types: Admin, Manager or User “(see next page for a further explanation). As soon as you fill the individual’s information in, you will be able to assign them a fax line (direct lines that only they can access and/or group lines that various people can access). Assigning number and group doesn’t have to occur during at this step and can be edited at any time for any existing account.
To add a new account, click the organization name dropdown in the header navigation and select the “Accounts & Groups” page.
Click the +New Account button which will open the stepper.
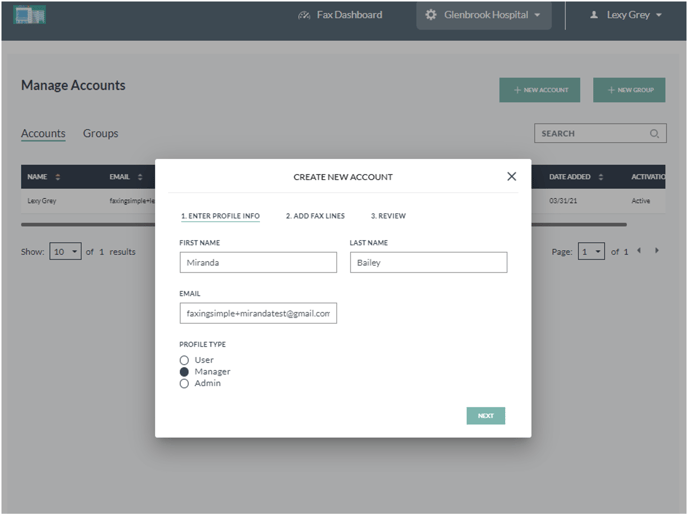
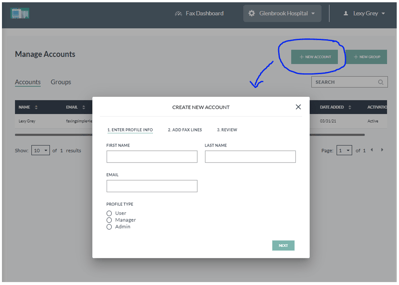 Fill in the first name, last name and desired email address. The email address must be valid and not already in use by another account.
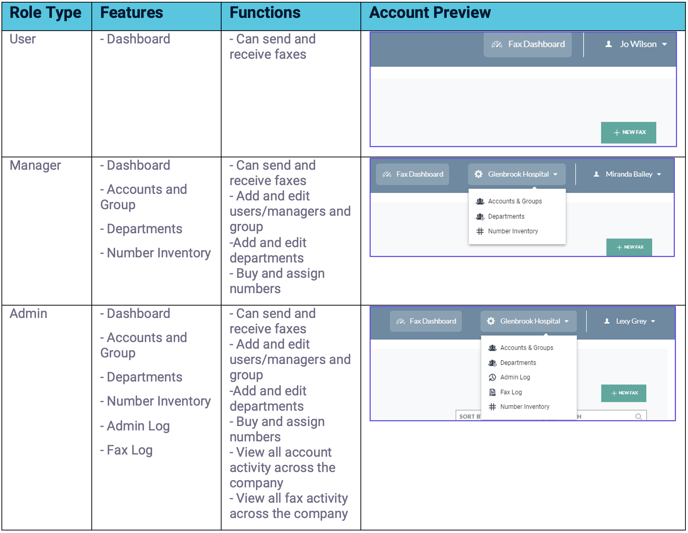
Select the level on access from one of the following role types: user, manager, admin
User: a user is the most basic level of the three. It allows the account user to send and receive faxes from their phone lines. This account type can access any fax on their dashboard for reviewing, and they can also edit their profile.
Manager: a manager role, like the user role, has full access to the dashboard and its various functions. On top of that the manager will see a company name dop down menu at the top on their page which allows the manager to add and edit accounts and groups, departments and the number inventory.
Admin: an admin role is a super-user role in the application. The admin can do everything the manager can, and on top of that had access to the admin log and the fax log which both track all account related activities across the company.
Use the following table as a reference on role types:
 Once the desired role type was chosen click NEXT
 The Add Fax Lines section allow you to assign numbers to the account, either by adding them to a group line or providing them with their own direct line. Click on the Fax Line Type dropdown to select one of these options.
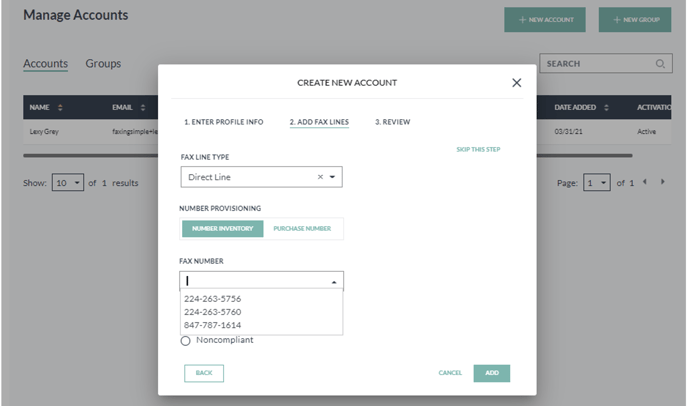
- If you select Direct Line, you will be given the option to select a number from your inventory (if available) or to purchase a new number in a specific area code. When purchasing, the actual number will be assigned when the form is submitted at the end of the flow. Select whether you would like the line to be compliant or noncompliant.
- If you select Group Line, a second dropdown field will then appear to choose an existing group. If you need to create a new group, you can exit the flow to go make it or you can complete the flow, create the new group later and add the account at that time.
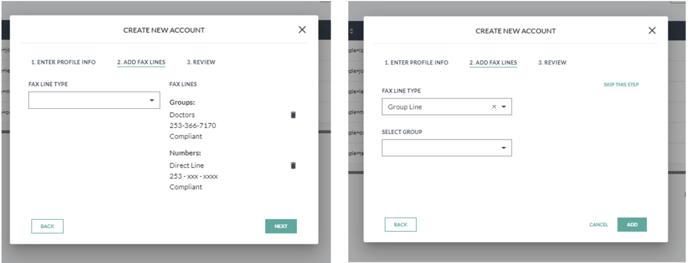
- If you would prefer not to assign a number to the account at this time, click Skip This Step in the upper righthand corner. As mentioned before, you will be able to edit this account as soon as it exists.
After selecting your line type (in this case I added two lines – one direct and one as a group) and filling in the fields, click Add. The details will appear on the right side of the screen. Since I don’t have a 253 number in inventory I am purchasing the number here. Once I submit my order a 253 number will be purchased, immediately activated, and assigned to this account.
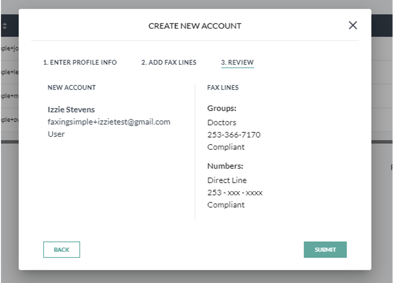 If you would like to add any additional numbers, use the empty dropdown to select the next line type and complete the flow. Repeat the process until all desired numbers and groups have been added. Review the summary, if necessary, use the back button to edit text on previous pages and click the trash can icon to remove unwanted numbers. Otherwise, click Submit.
Completing the flow will purchase any new numbers and send an invite to the entered email. Watch for the popup that confirms the account has been created.